
FREE COURSES: Winter Wednesdays with the Provincetown Library
Create Your Ideal Top
with Greg Salvatori
Understanding Measurements and Our Unique Shape
Measuring the body
Students are introduced to the principles of taking body measurements.
Students are paired up to measure each other and create a base reference for pattern making.
Understanding the Human Form
Differences between front and back measurements: neck, chest, waist, and hips.
Common mistakes in measuring sleeves and chest.
Differences in fit between comfortable (casual) and formal clothing.
Key Measurements
Neck
Shoulder Width
Shoulder Length
Shoulder High Point
Chest
Front Chest
Back Chest
Waist
Front Waist Height
Back Waist Height
Front Length
Back Length
Hips
Armhole Depth
Armhole Circumference
Bicep
Wrist
Sleeve Length
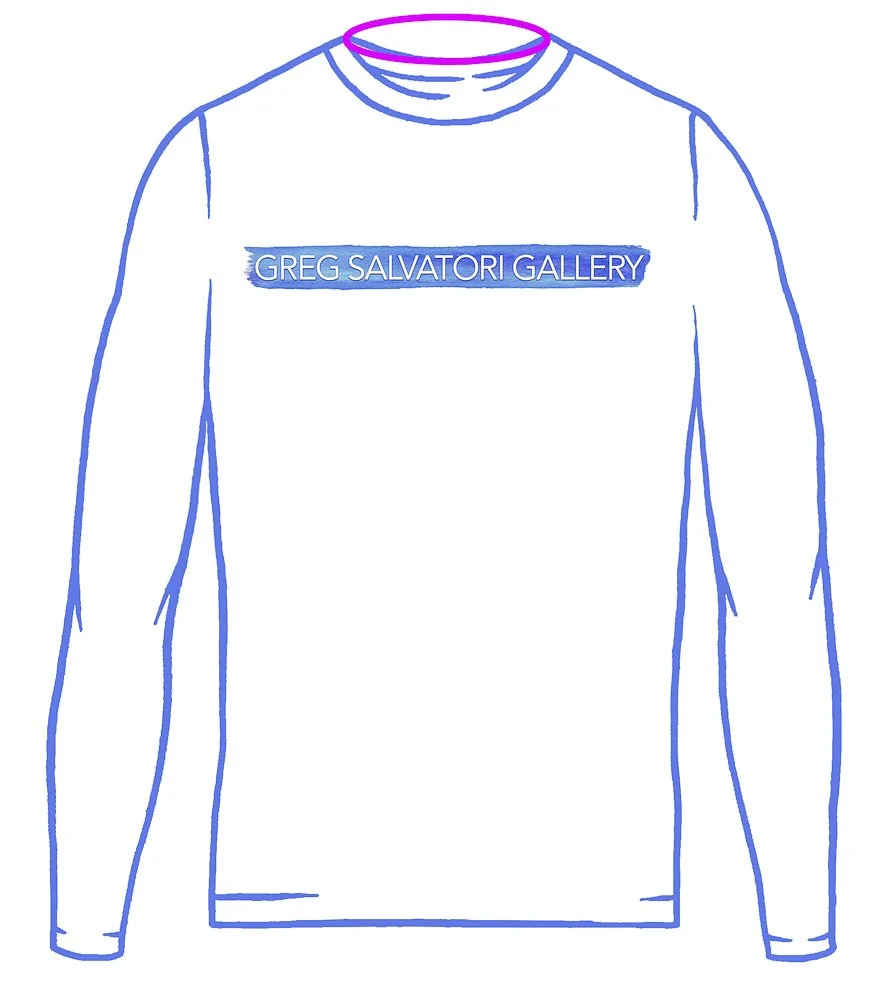
1. NECK
Measure the circumference around the base of your neck, leaving 2 finger under the measuring tape to allow for natural and comfortable movements.
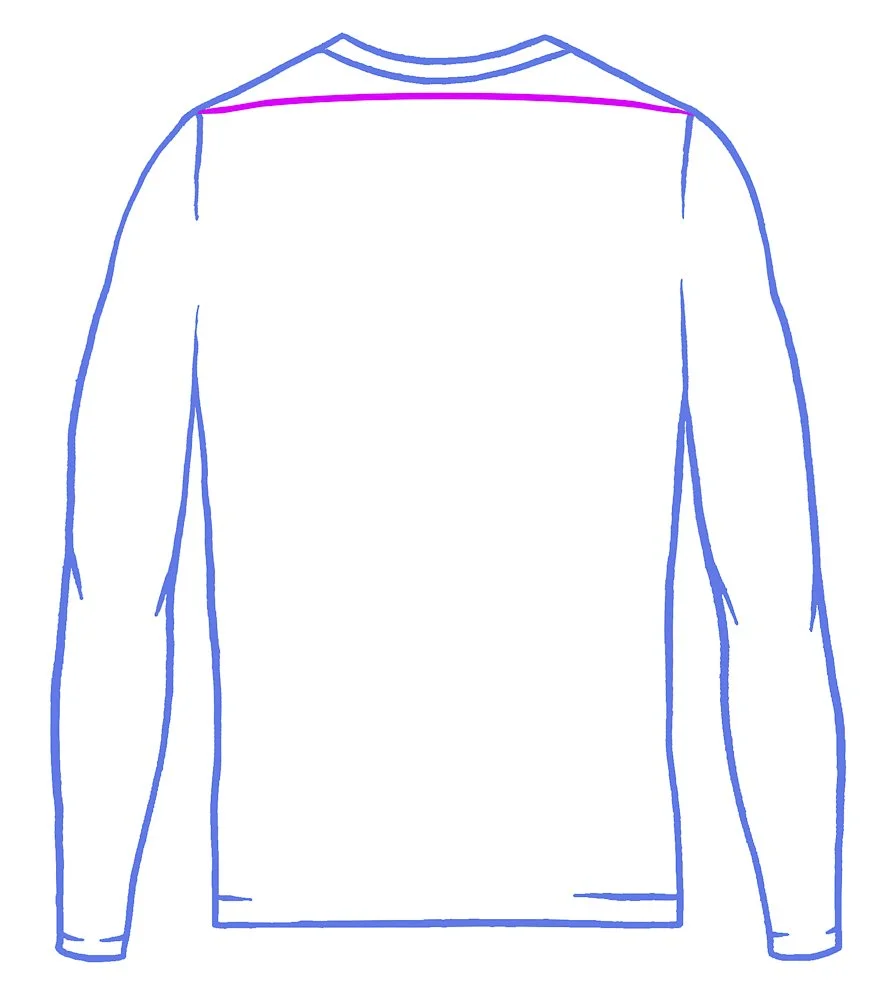
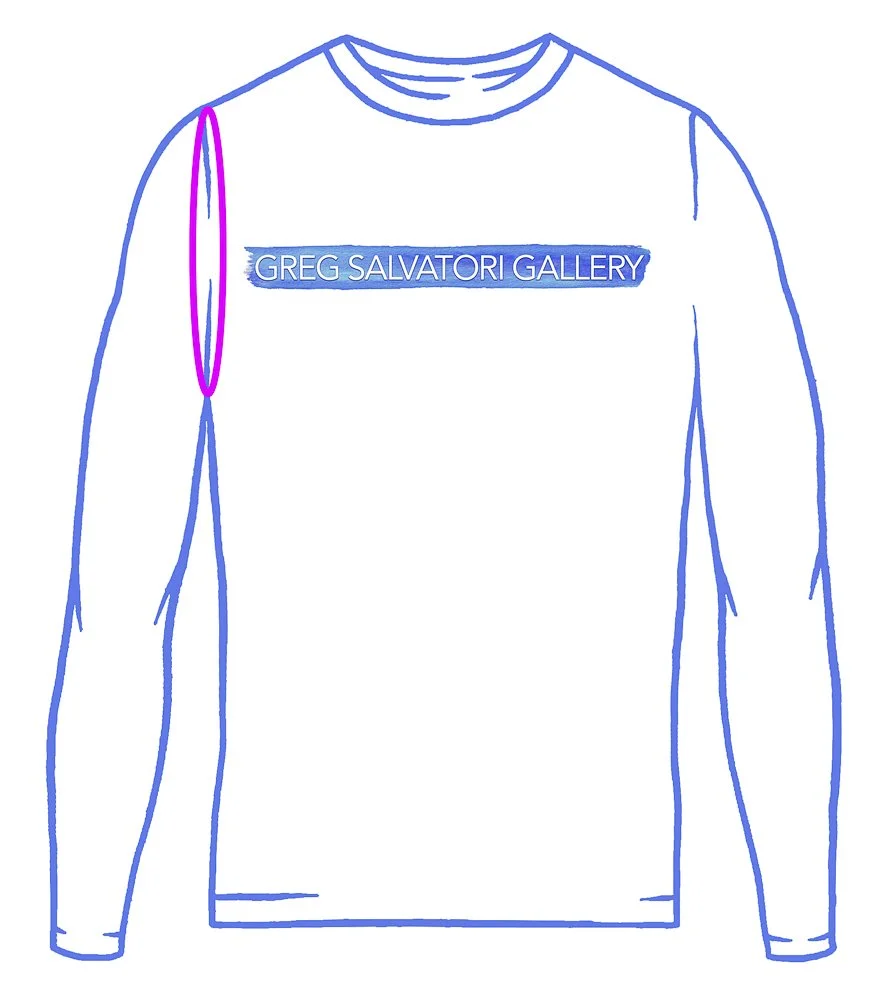
2. Shoulder Width
Measure the distance between the shoulders, where the bodice meets the sleeve (the outer tip of your collar bone) going above the shoulder blades.
TIP: You can put two pins on the tip of the shoulders to make it easier to take this measurement. They will be useful when taking other measurements too.
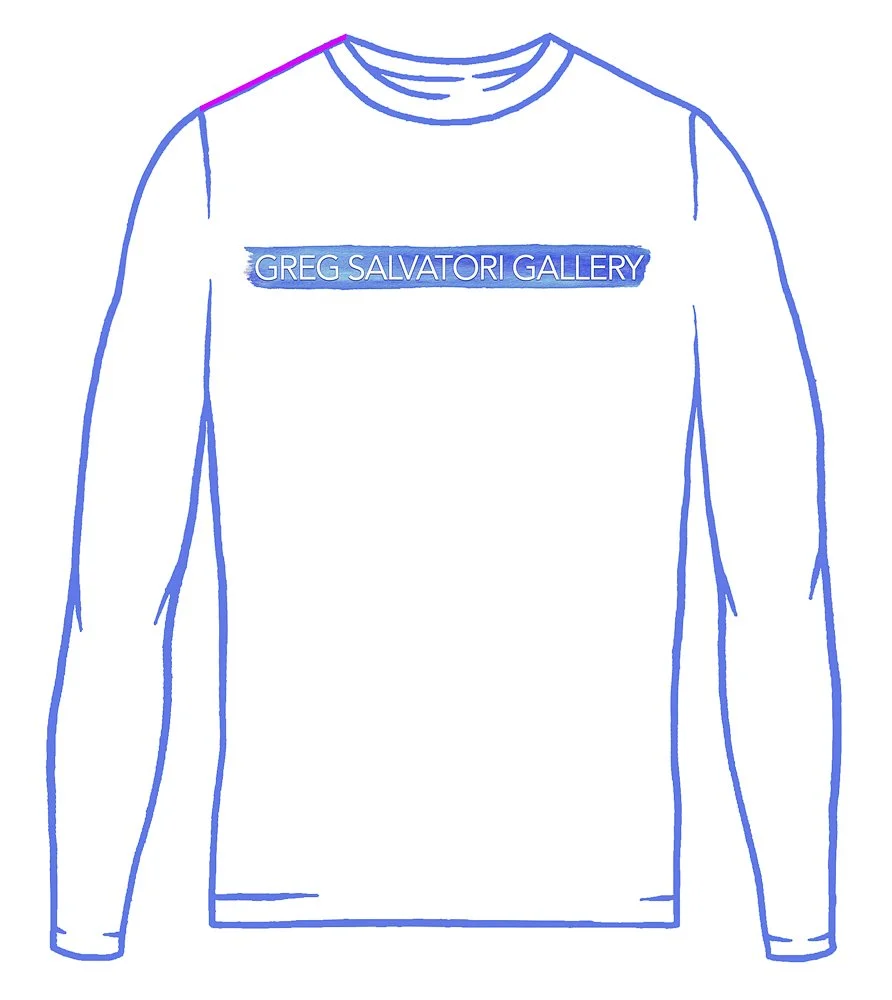
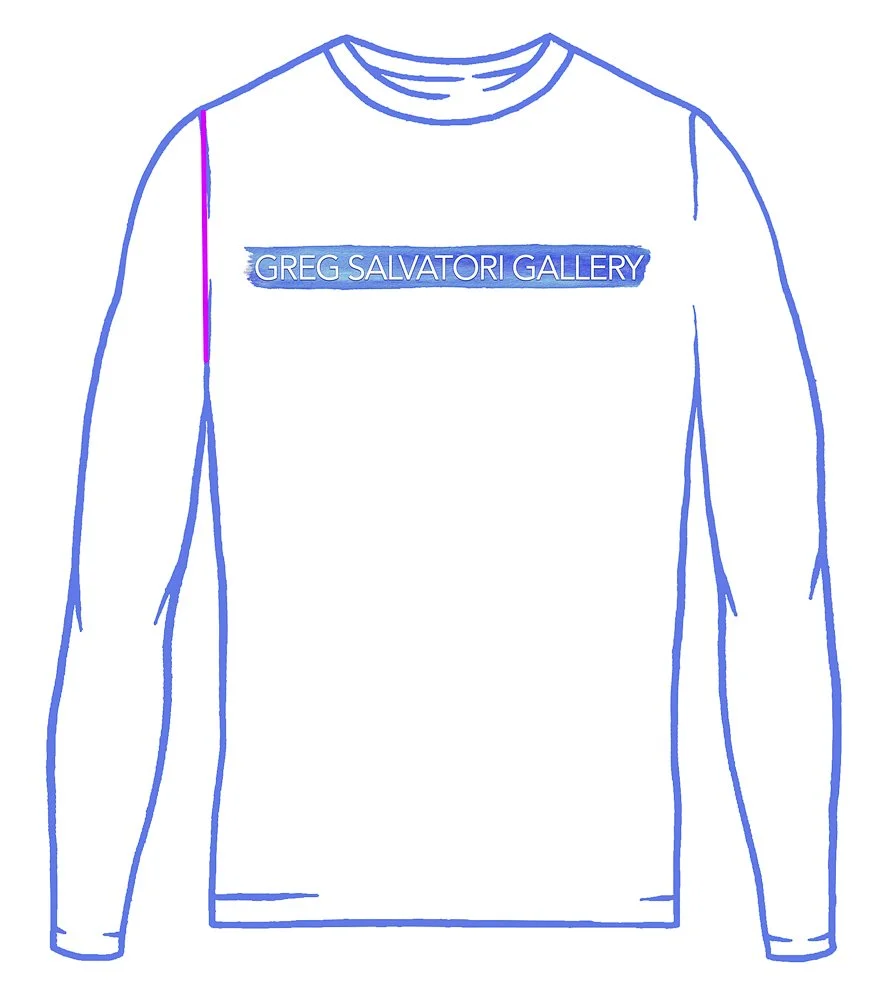
3. Shoulder Length
Measure the distance between the base of the neck and the tip of the shoulder, where the bodice meets the sleeve. Refer to your pins if you’re using the easy method.
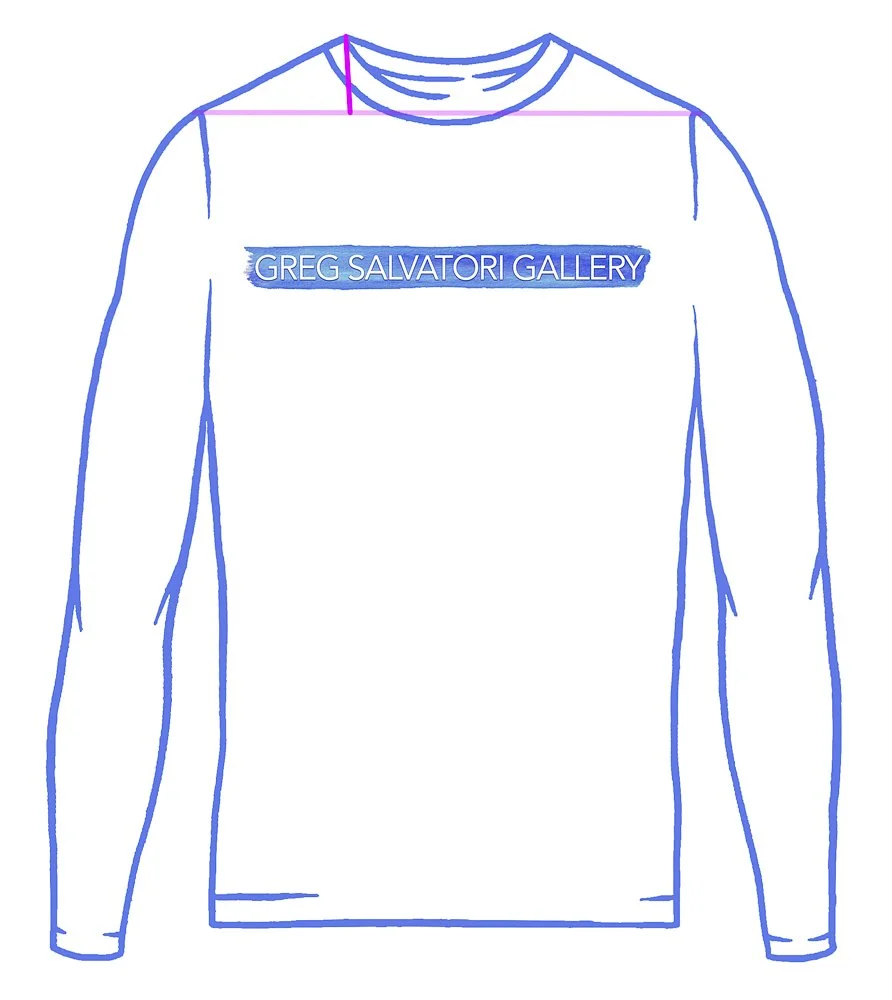
4. Shoulder High Point
Measure the distance between the base of the neck and an imaginary line connecting the shoulder tips. Refer to your pins if you’re using the easy method.
TIP: For most people this measure is between 2½ and 3½ inches.
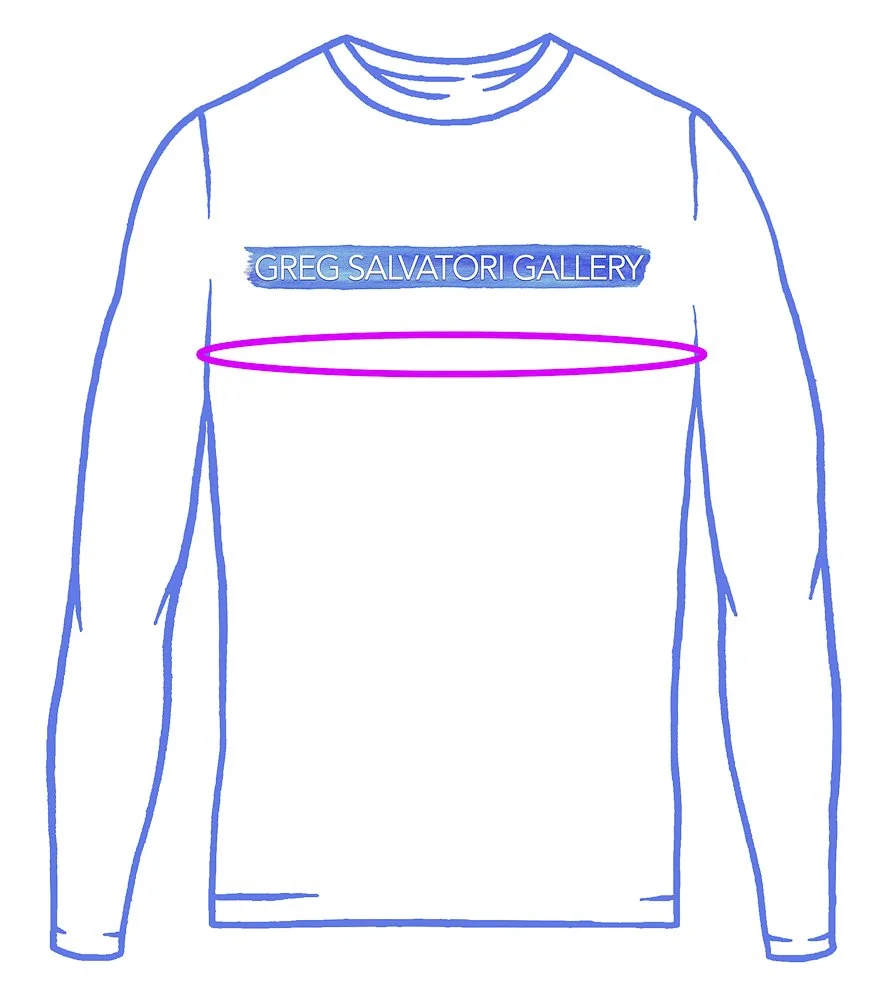
5. Chest Circumference
Measure the circumference of the broader part of your upper chest, under the armpit, keeping the arm out slightly.
IMPORTANT: Make sure to keep the loop horizontal and pay attention to the front shape and the back muscles.
Make sure to breath normally to allow for a realistic measure (and a comfortable fit).
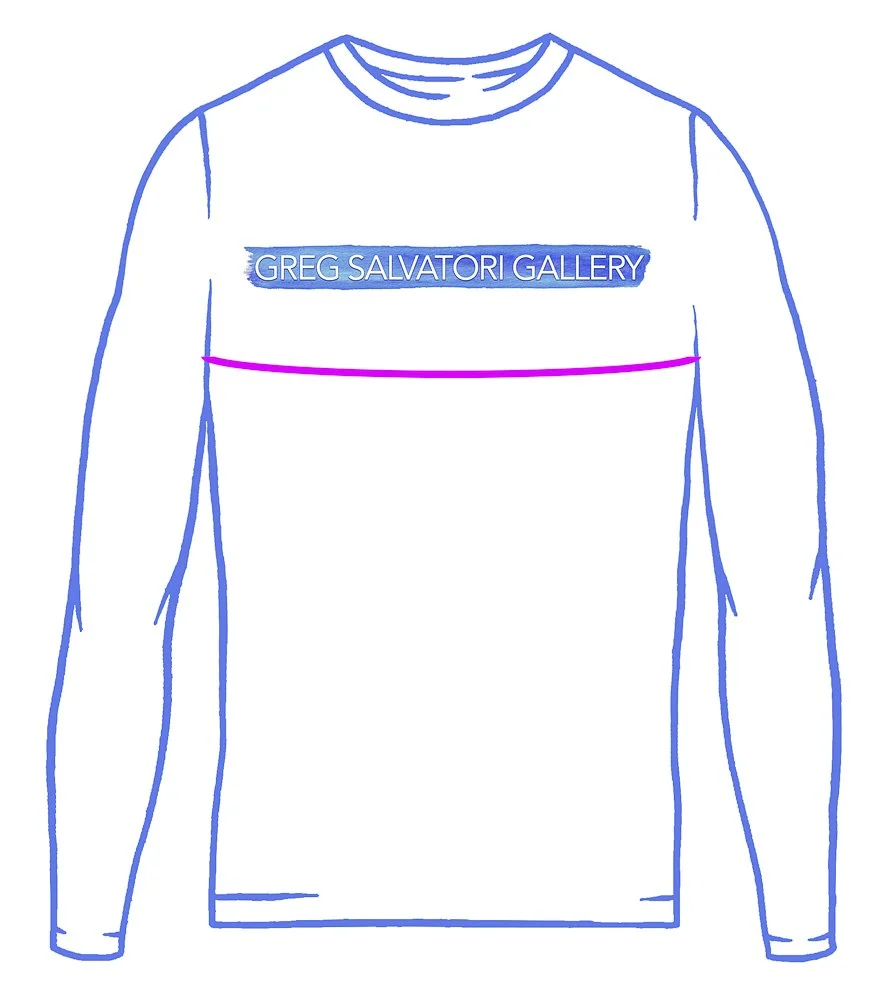
6. Front Chest
This is the frontal portion of the total chest circumference, extending from under the right armpit to the left.
TIP: if the person you’re taking measurement of is wearing a shirt, use the seam under the armpit as easy reference.
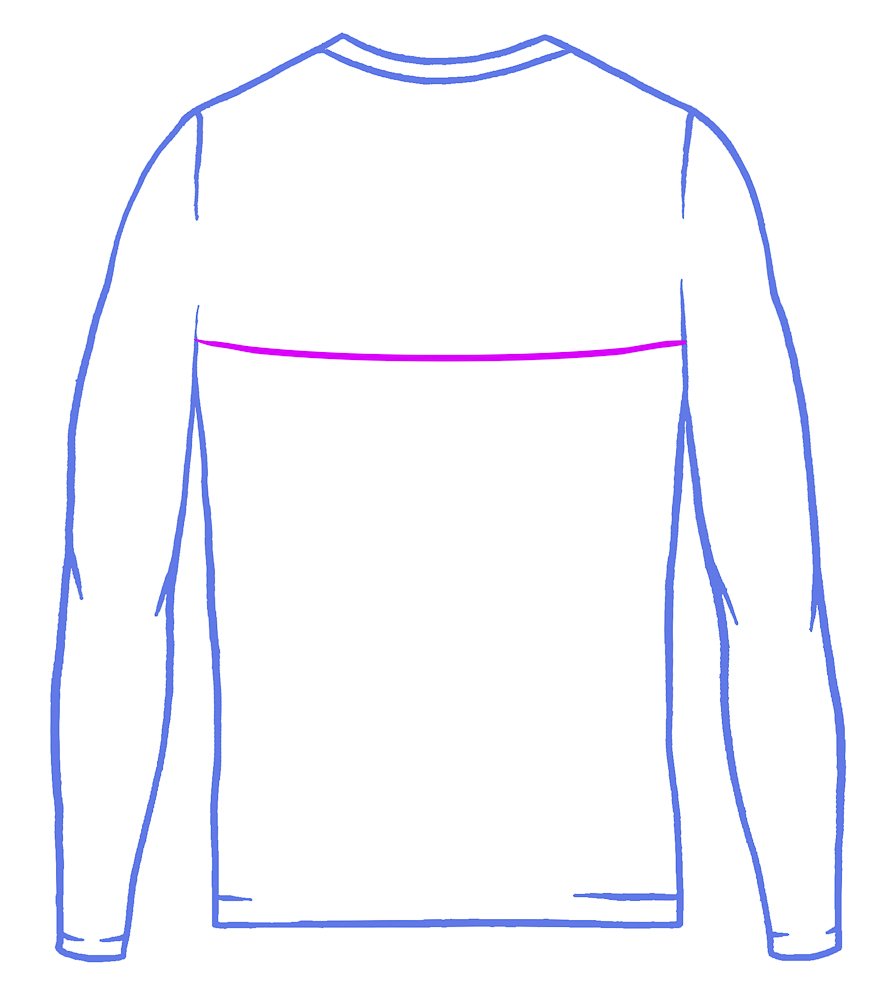
7. Back Chest
This is the back portion of the total chest circumference, extending from under the right armpit to the left. This measure is slightly smaller than the front chest for most people.
TIP: Use the seam under the armpit as easy reference.
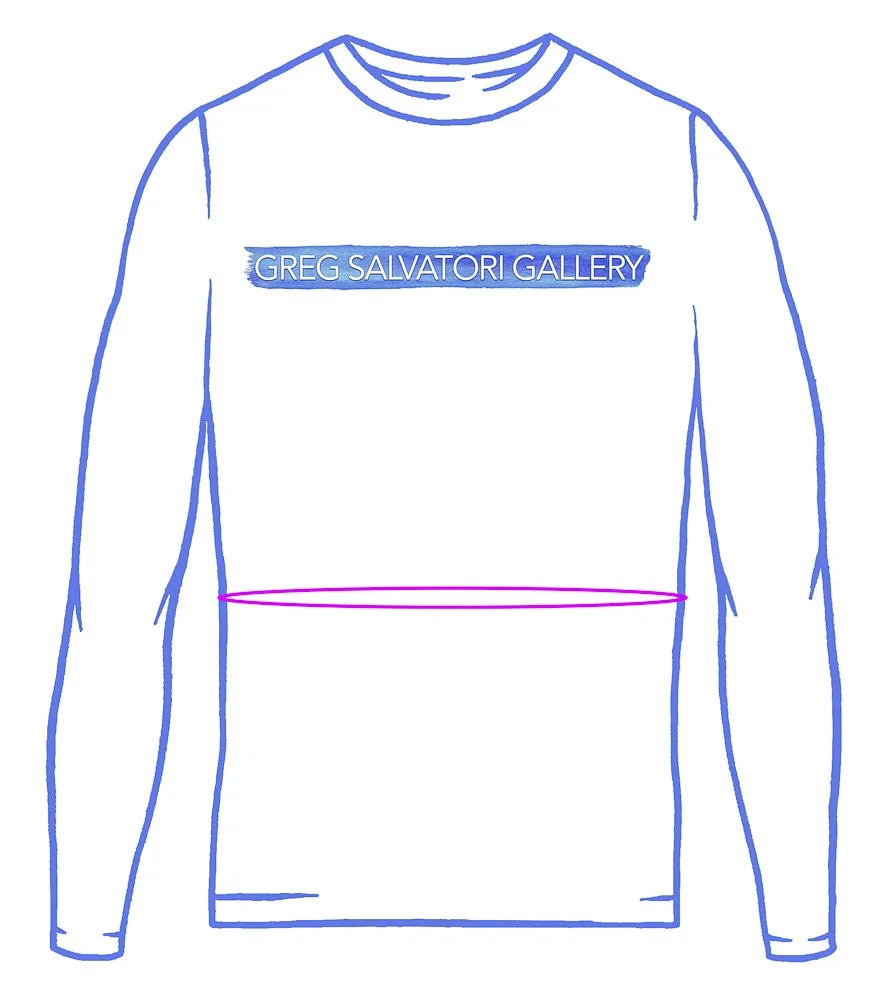
8. Waist
Making sure to keep the loop horizontal, take the measurement of the waist. It’s roughly around the navel for most of us. While it’s not the thinnest part of the body for everyone, you can find it by asking the person to bend on each side.
TIP: Take a piece of string and tie it comfortably around the model’s waist. It will help you take a realistic measurement and you’ll refer to it while taking the waist height measurement (next).
9. Front Waist Height
Take the measurement from the side of the neck to the waist. Refer to the string around the waist if you’re using this easy method.
10. Back Waist Height
Take the measurement from the side of the neck to the waist in the back of the model. Refer to the string around the waist if you’re using this easy method.
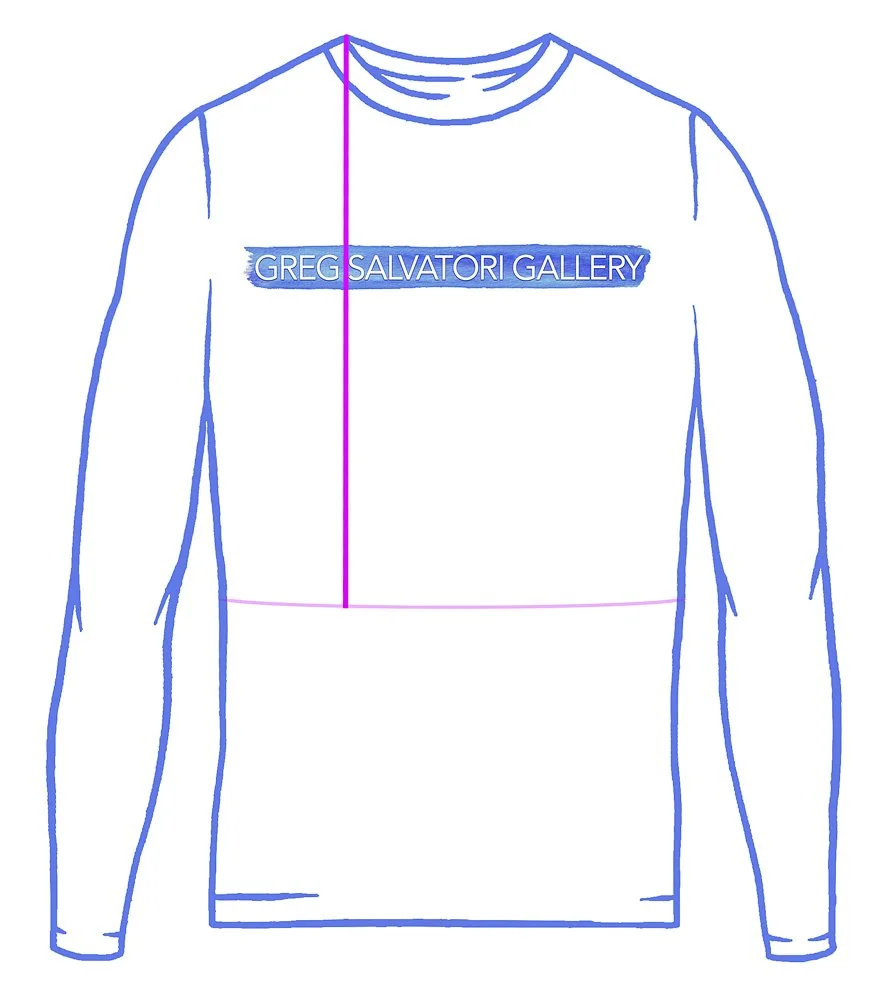
11. Front Length
Take the measurement from the side of the neck to desired length of the garment. This measurement is fully dependent on your taste and how long you wish the garment to be.

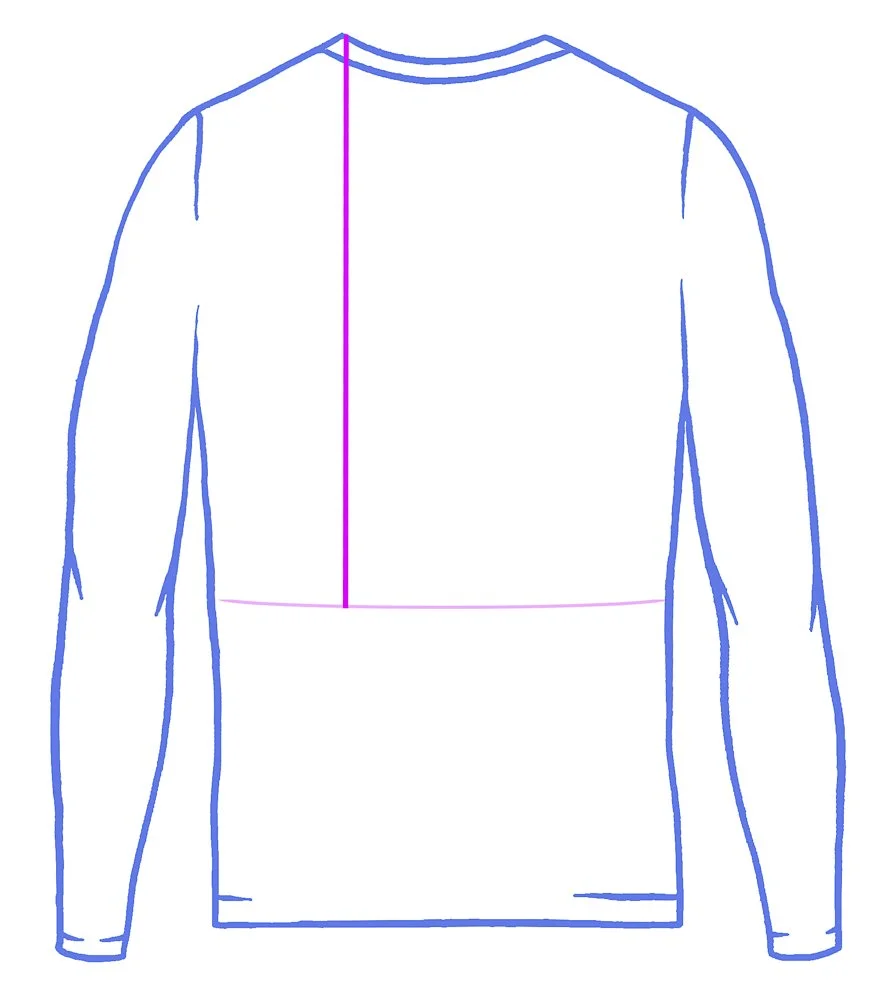
12. Back Length
Take the measurement from the side of the neck to the bottom of the garment.
IMPORTANT: The back length is usually slightly longer than the front, due to the slope in our upper back/shoulders. To take an accurate measure is necessary to match the front or the garment. You can use the waist points as reference to keep the bottom of the garment perpendicular to the floor.
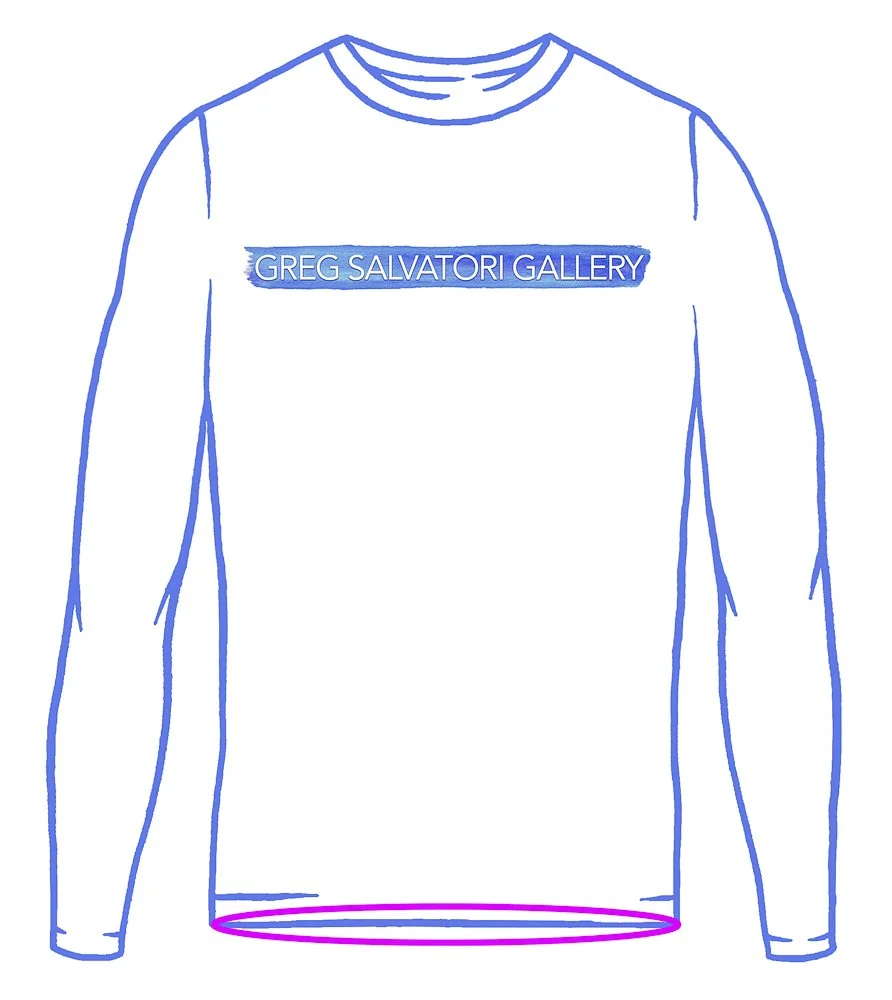
13. Hips
Take the circumference of the hips/bottom of the garment. Make sure to keep your loop perpendicular to the ground.
14. Armhole Depth
This measure determines the distance between the shoulder tip and lowest point of the armhole.
TIP: Ask the model to squees a book loosely under their arm to help you determine this measure.
IMPORTANT: Unless creating something super fitting with stretchy fabrics like spandex, you will need to allow for some room under the armpit for movement (“easing”). Casual and formal fits will also influence this measurement.
15. Armhole Circumference
Refer to your armhole depth point and the shoulder pin to measure circumference of the armhole.
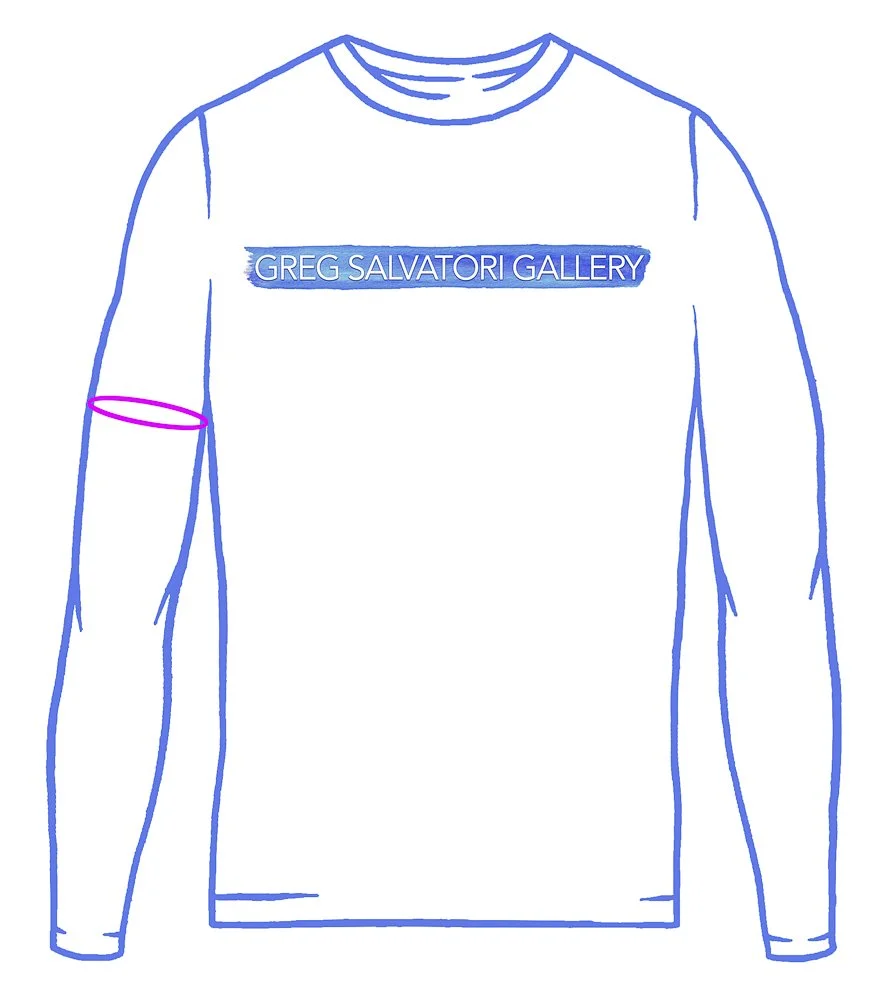
16. Bicep
Take the circumference of the bicep. Ask the model to flex to make sure you get safe reading.
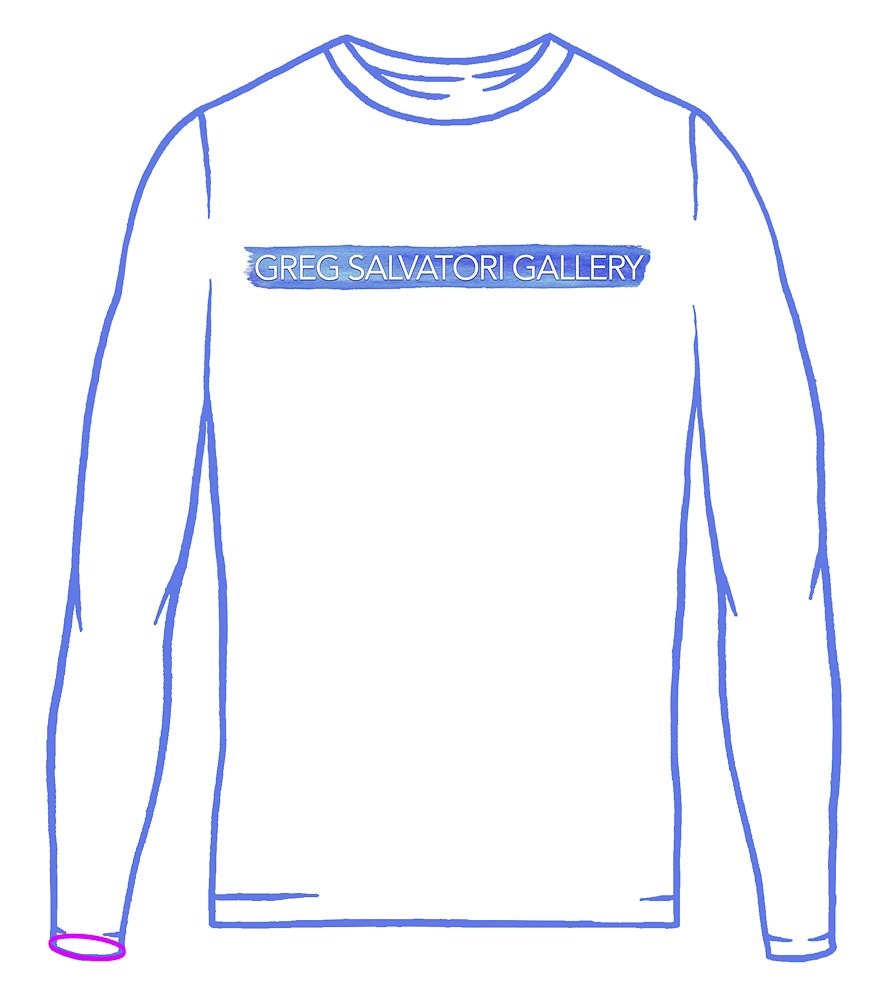
17. Wrist
Take the circumference of the wrist.
NOTE: when making garments, you will need to account for the fists to be able to pass through. Solutions include easing, stretchy fabrics, or buttons - like in a formal shirt.
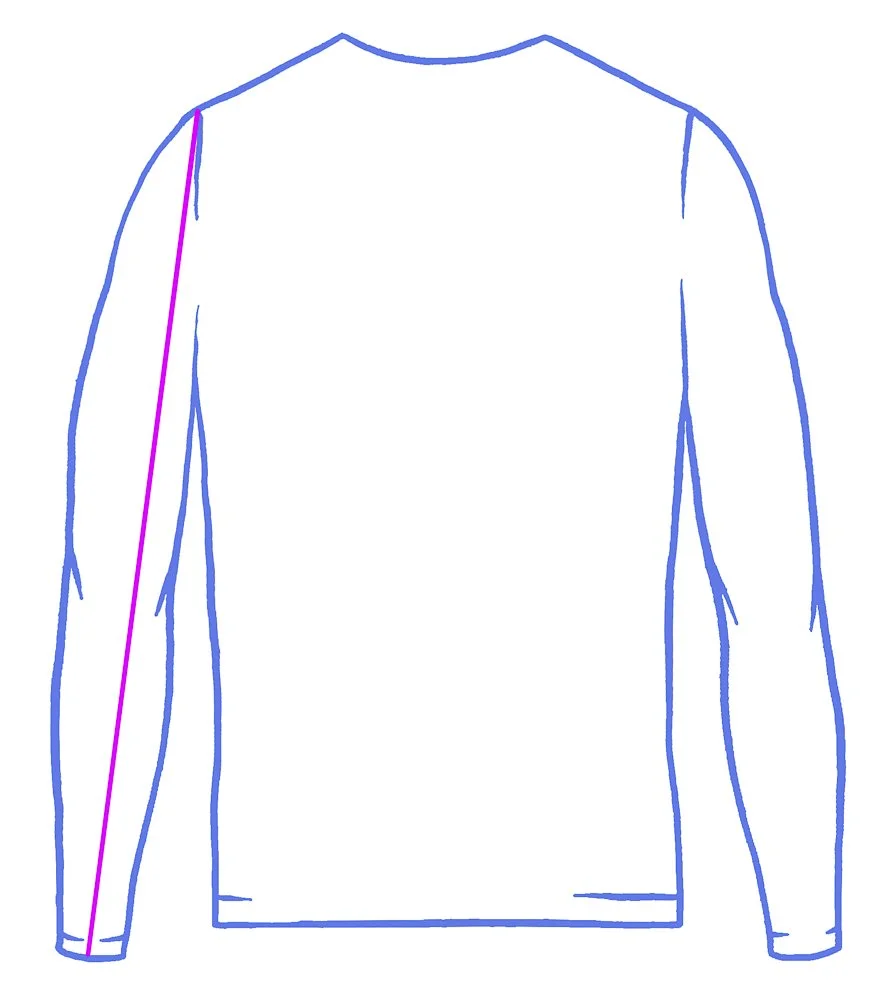
18. Sleeve Length
Take the measurement from the shoulder pin to the wrist - or the desired length of the sleeve.
IMPORTANT: Ask the model to bend the elbow at 90 degrees for an accurate reading. Walk the tape from the tip of the shoulder to the back of the arm, passing by the tip of the elbow, to the wrist. It the arm is straight, the finished sleeve will result too short.